Get started
Step 1: register your account
Please access iHealth developer website.
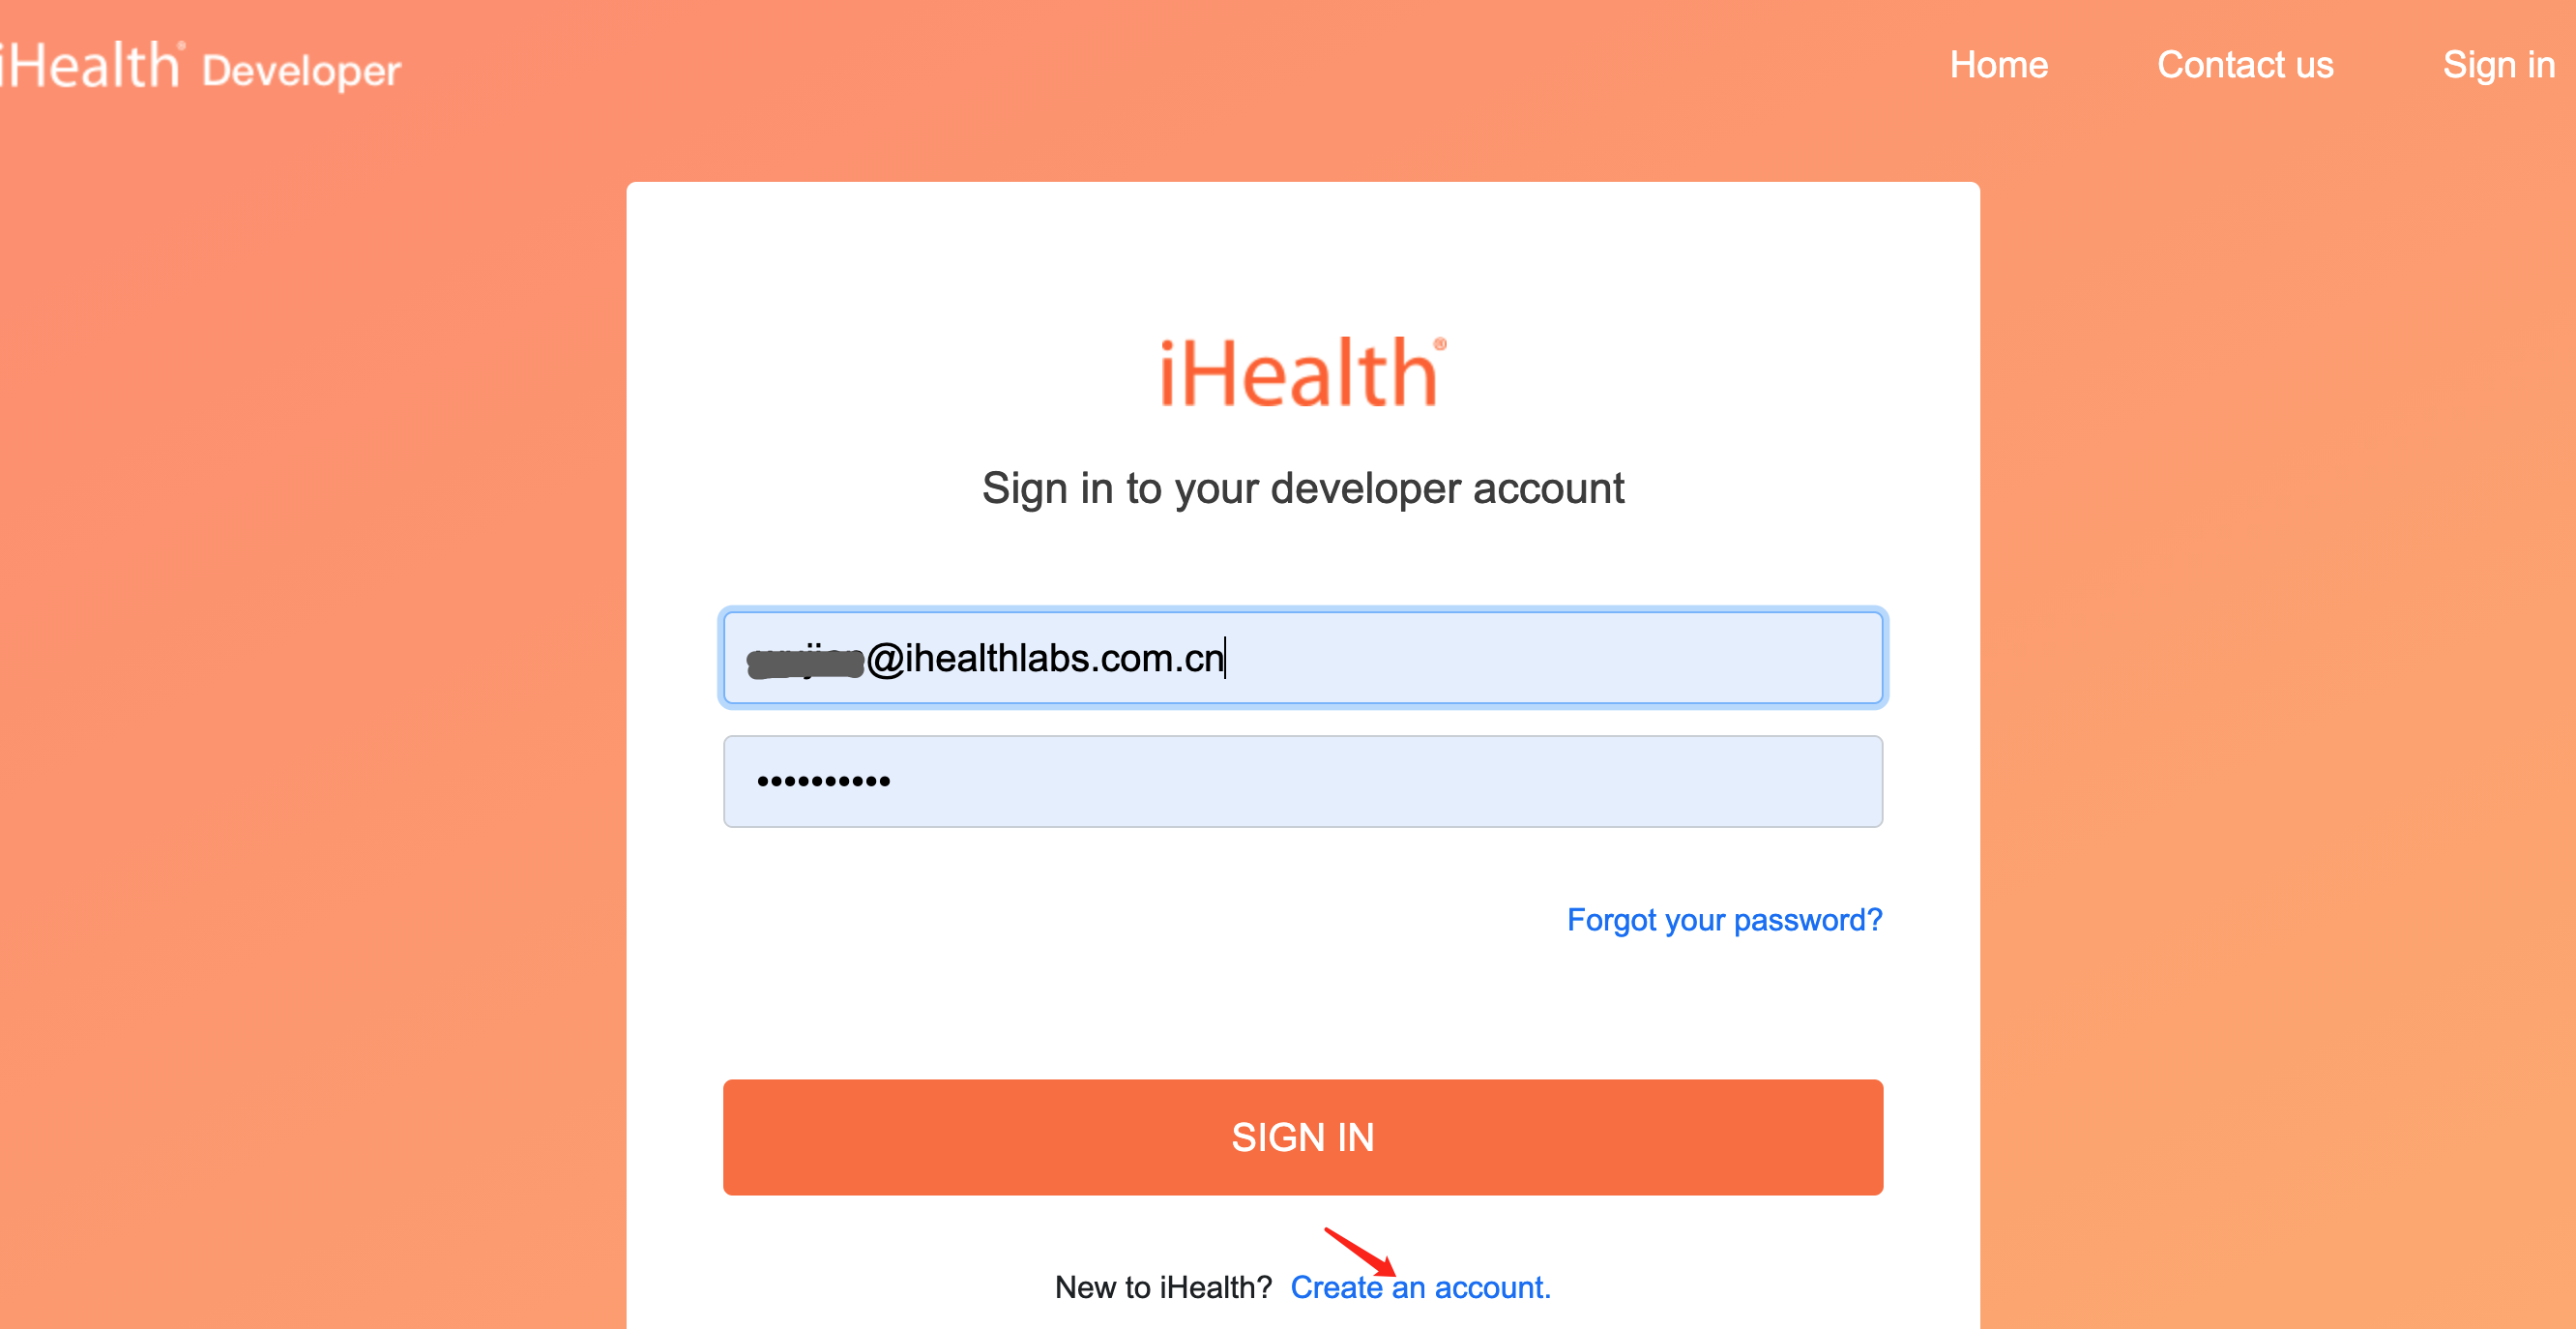
Press button "Create an account" and Jump into Register page, fill in the form and register your iHealth developer account.
Step 2: Create your application
If you already have registered your application, Please jump to Step 3.
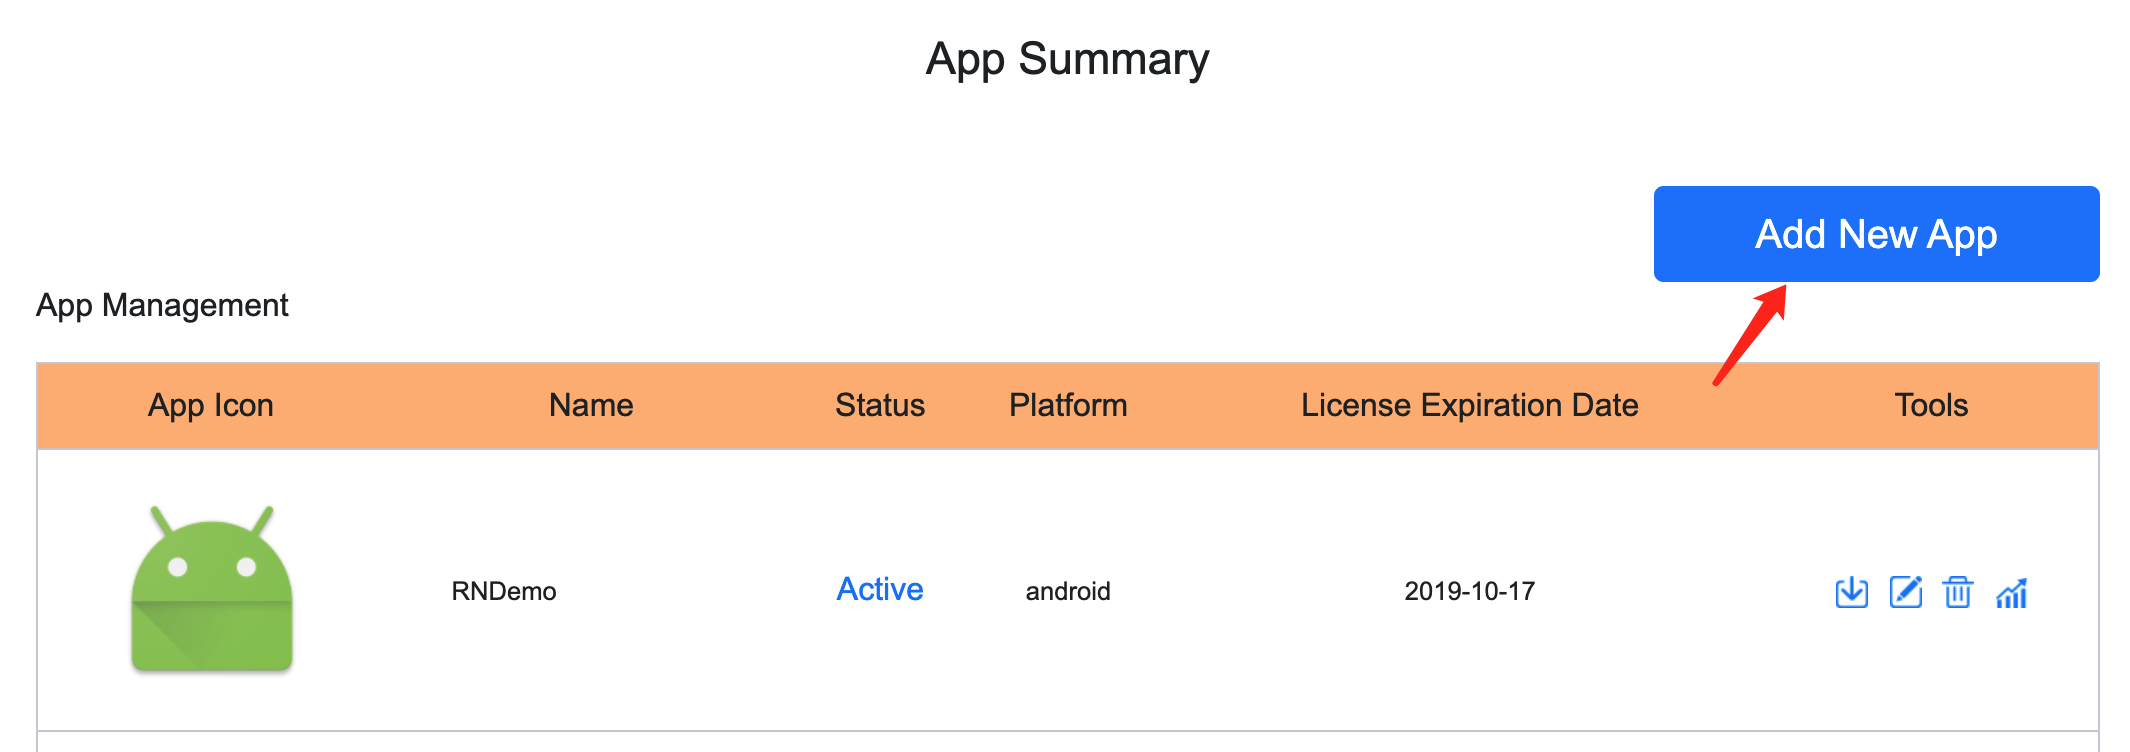
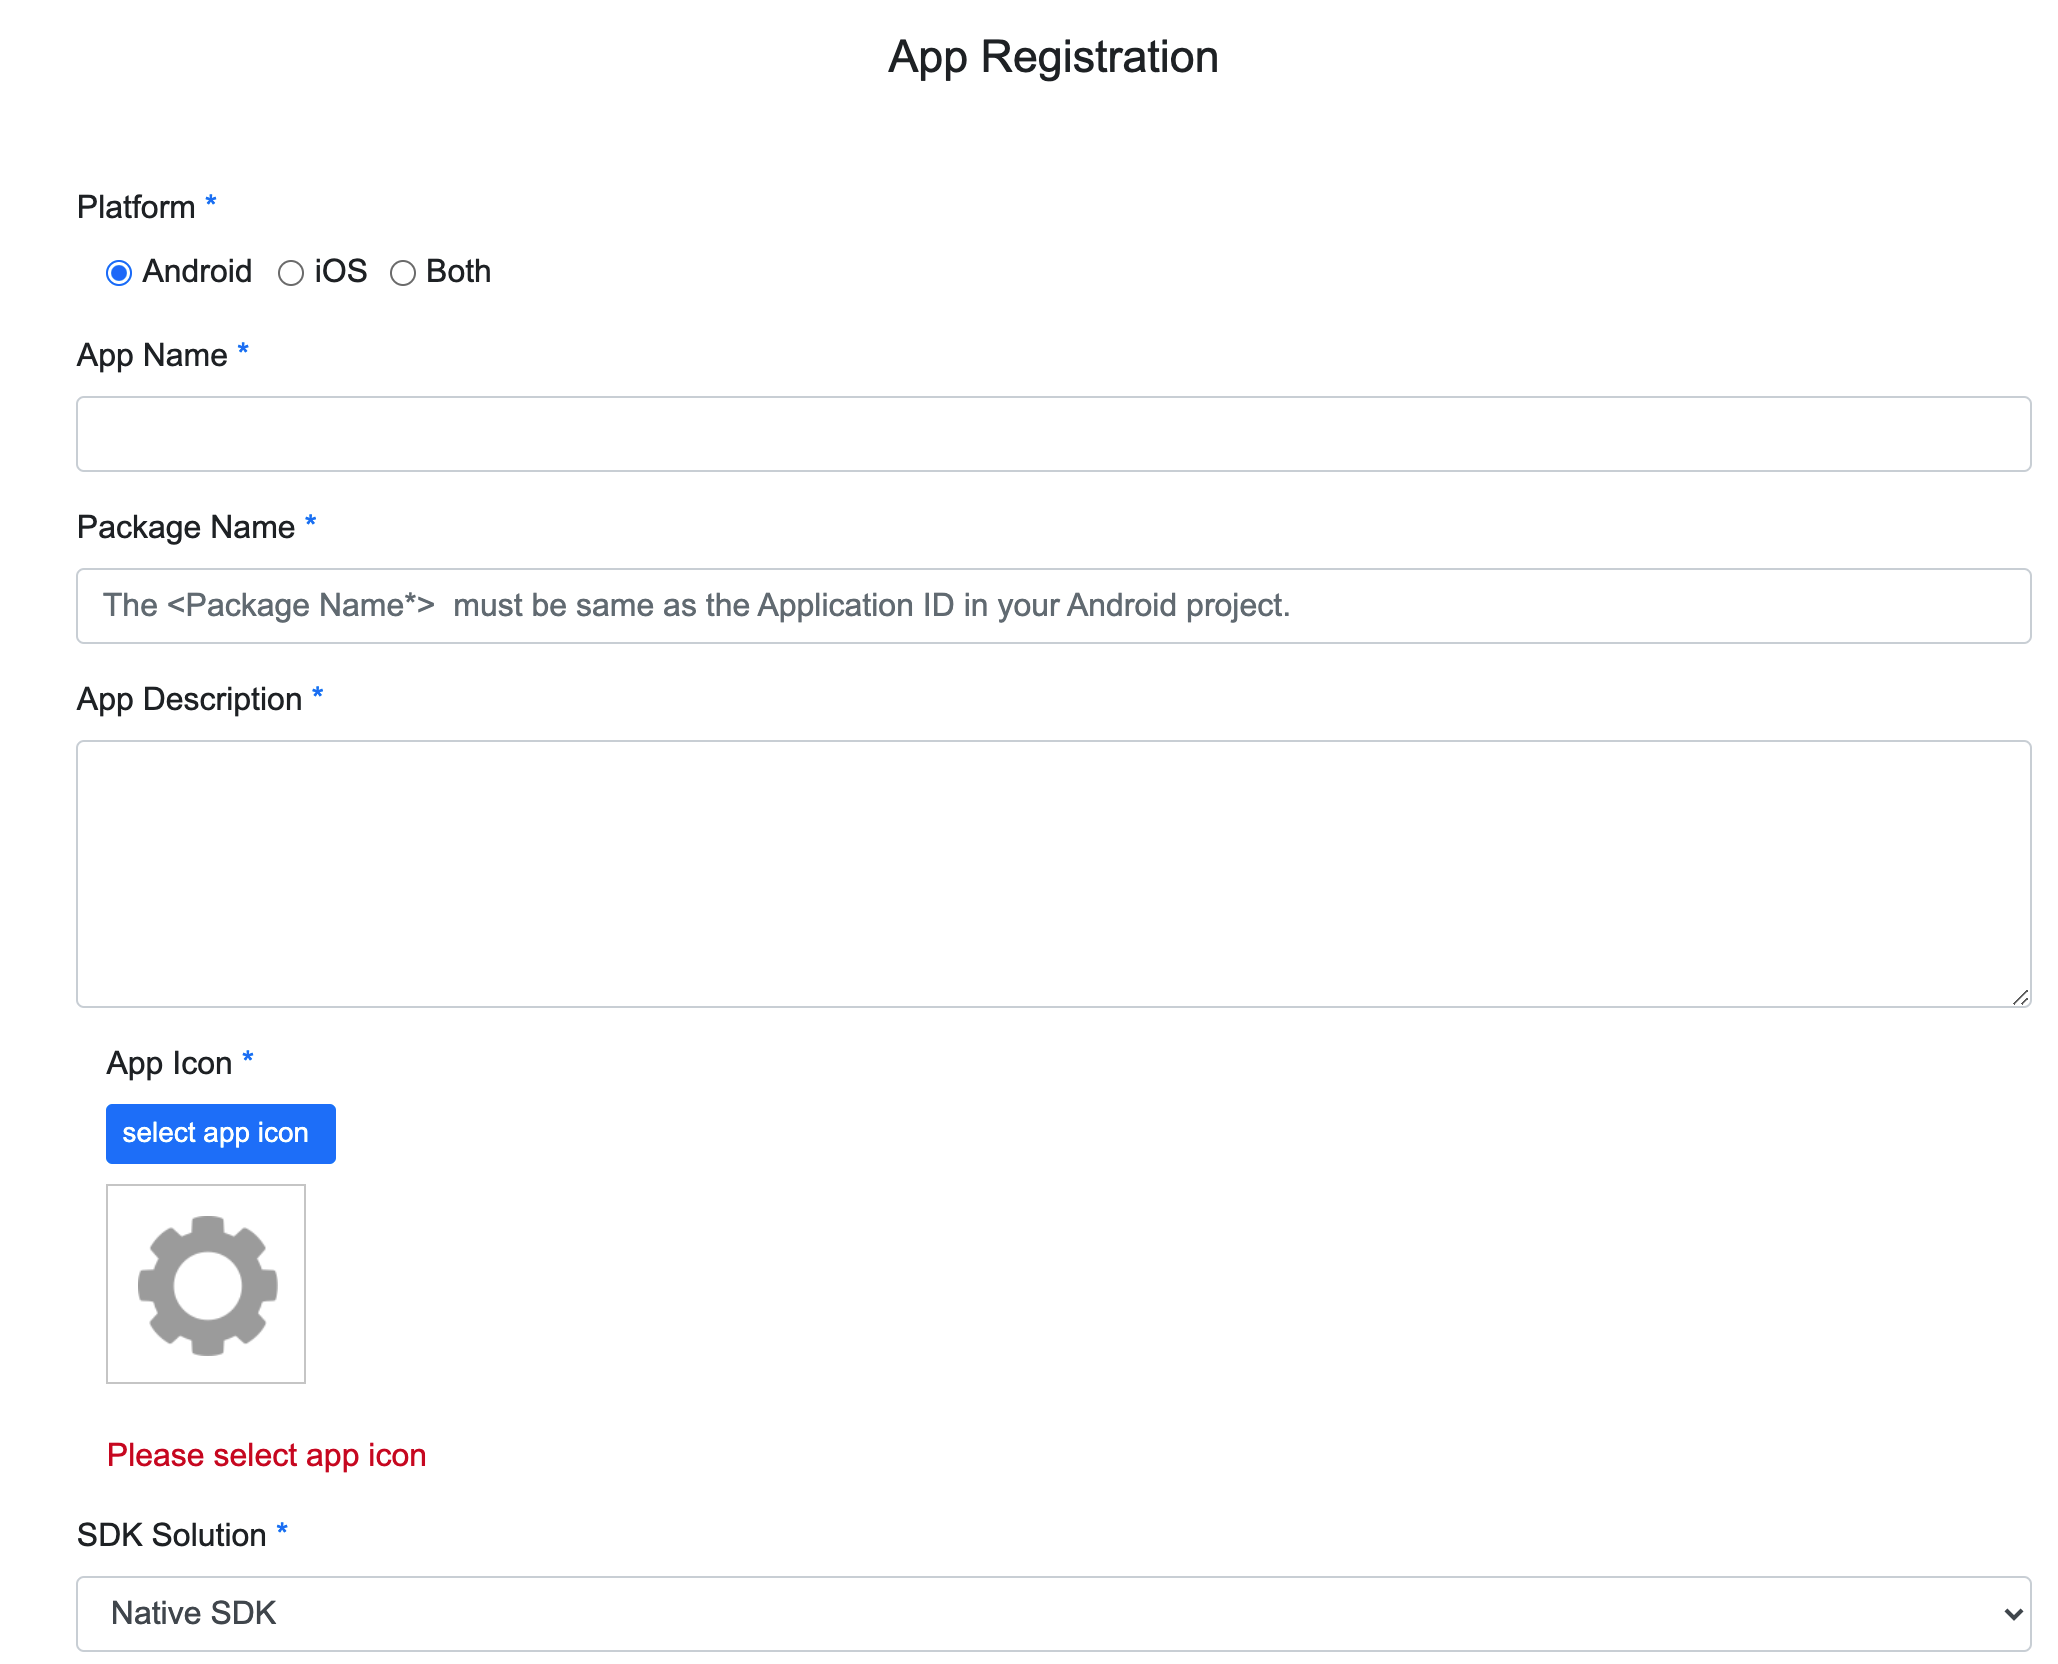
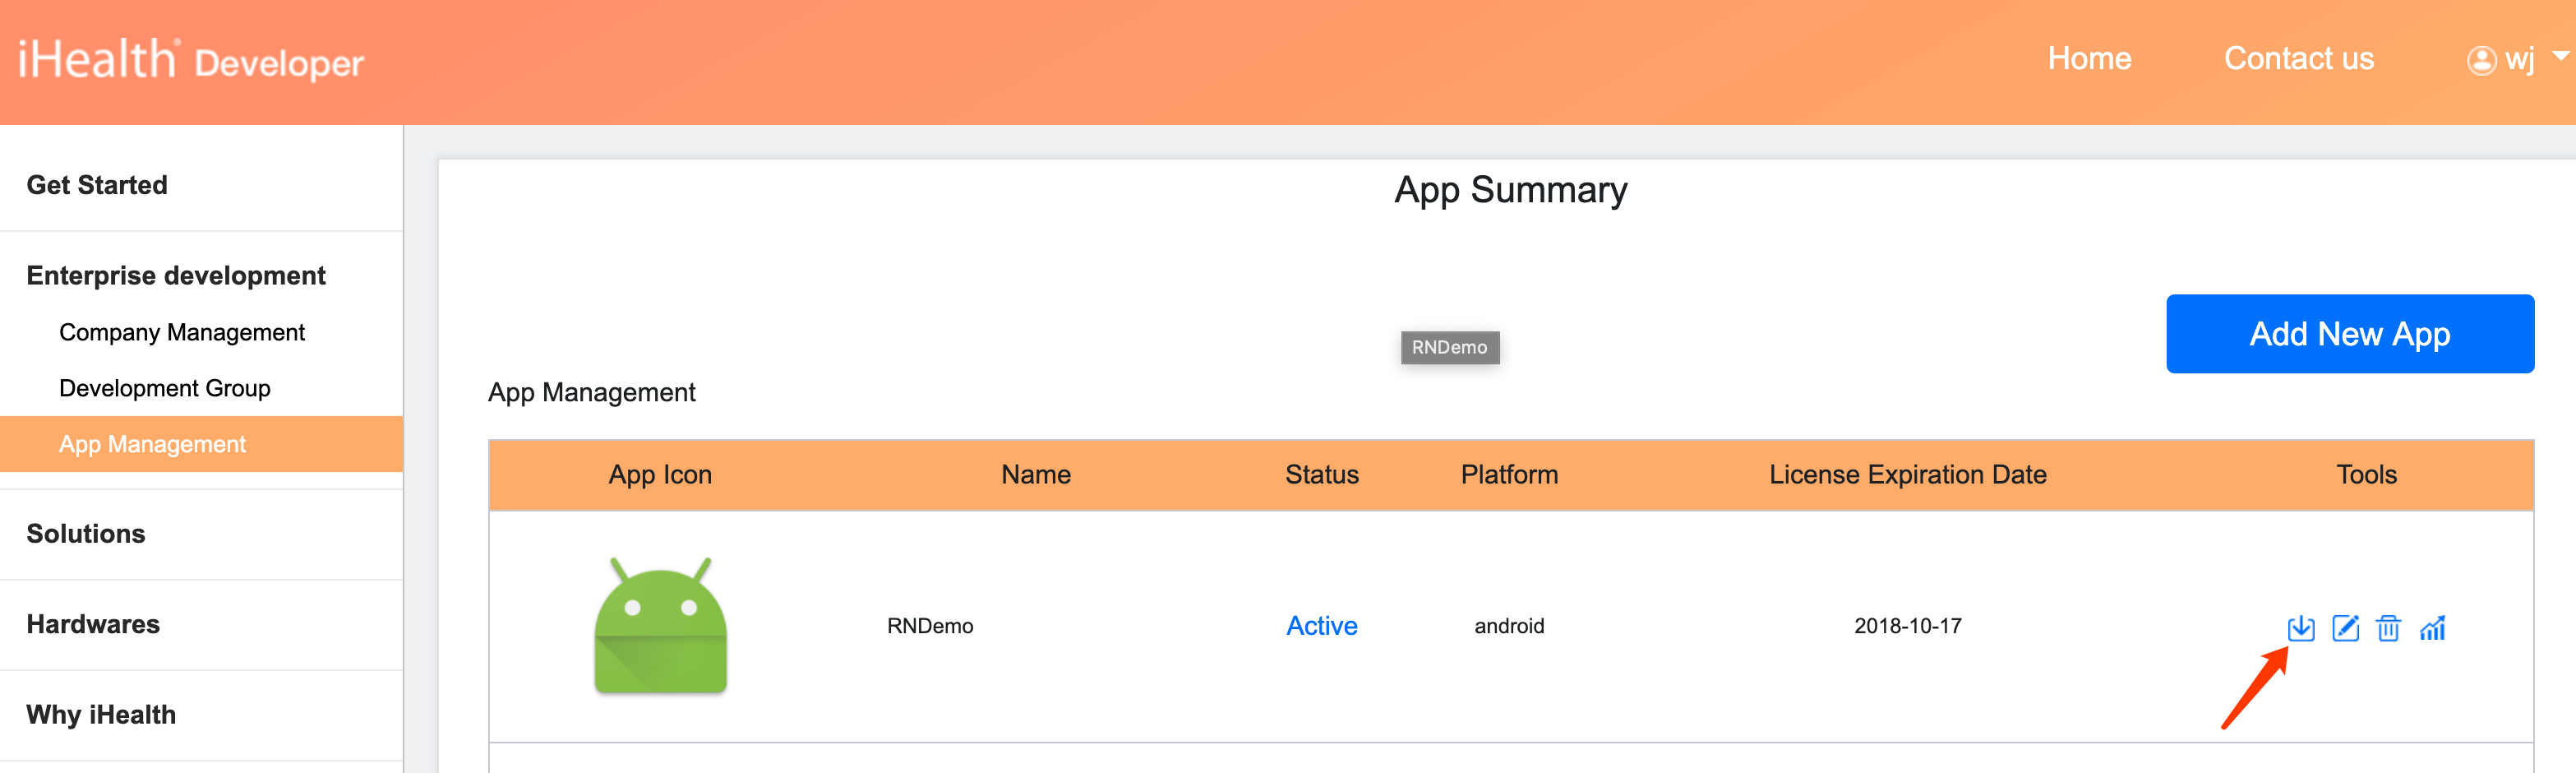
If you don't registered your application, Please press the "Enterprise Development" on left side of the page and go to "App Management". Please press button "Add New app" and fill in your information of your app, as shown below.
We will active the license for your application within 1-3 business days after receiving your email. If your app not been approved for long time, Please contact your iHealth account manager.
Step 3: Download the SDK and license file
After your app been approved, you can download the SDK solution.
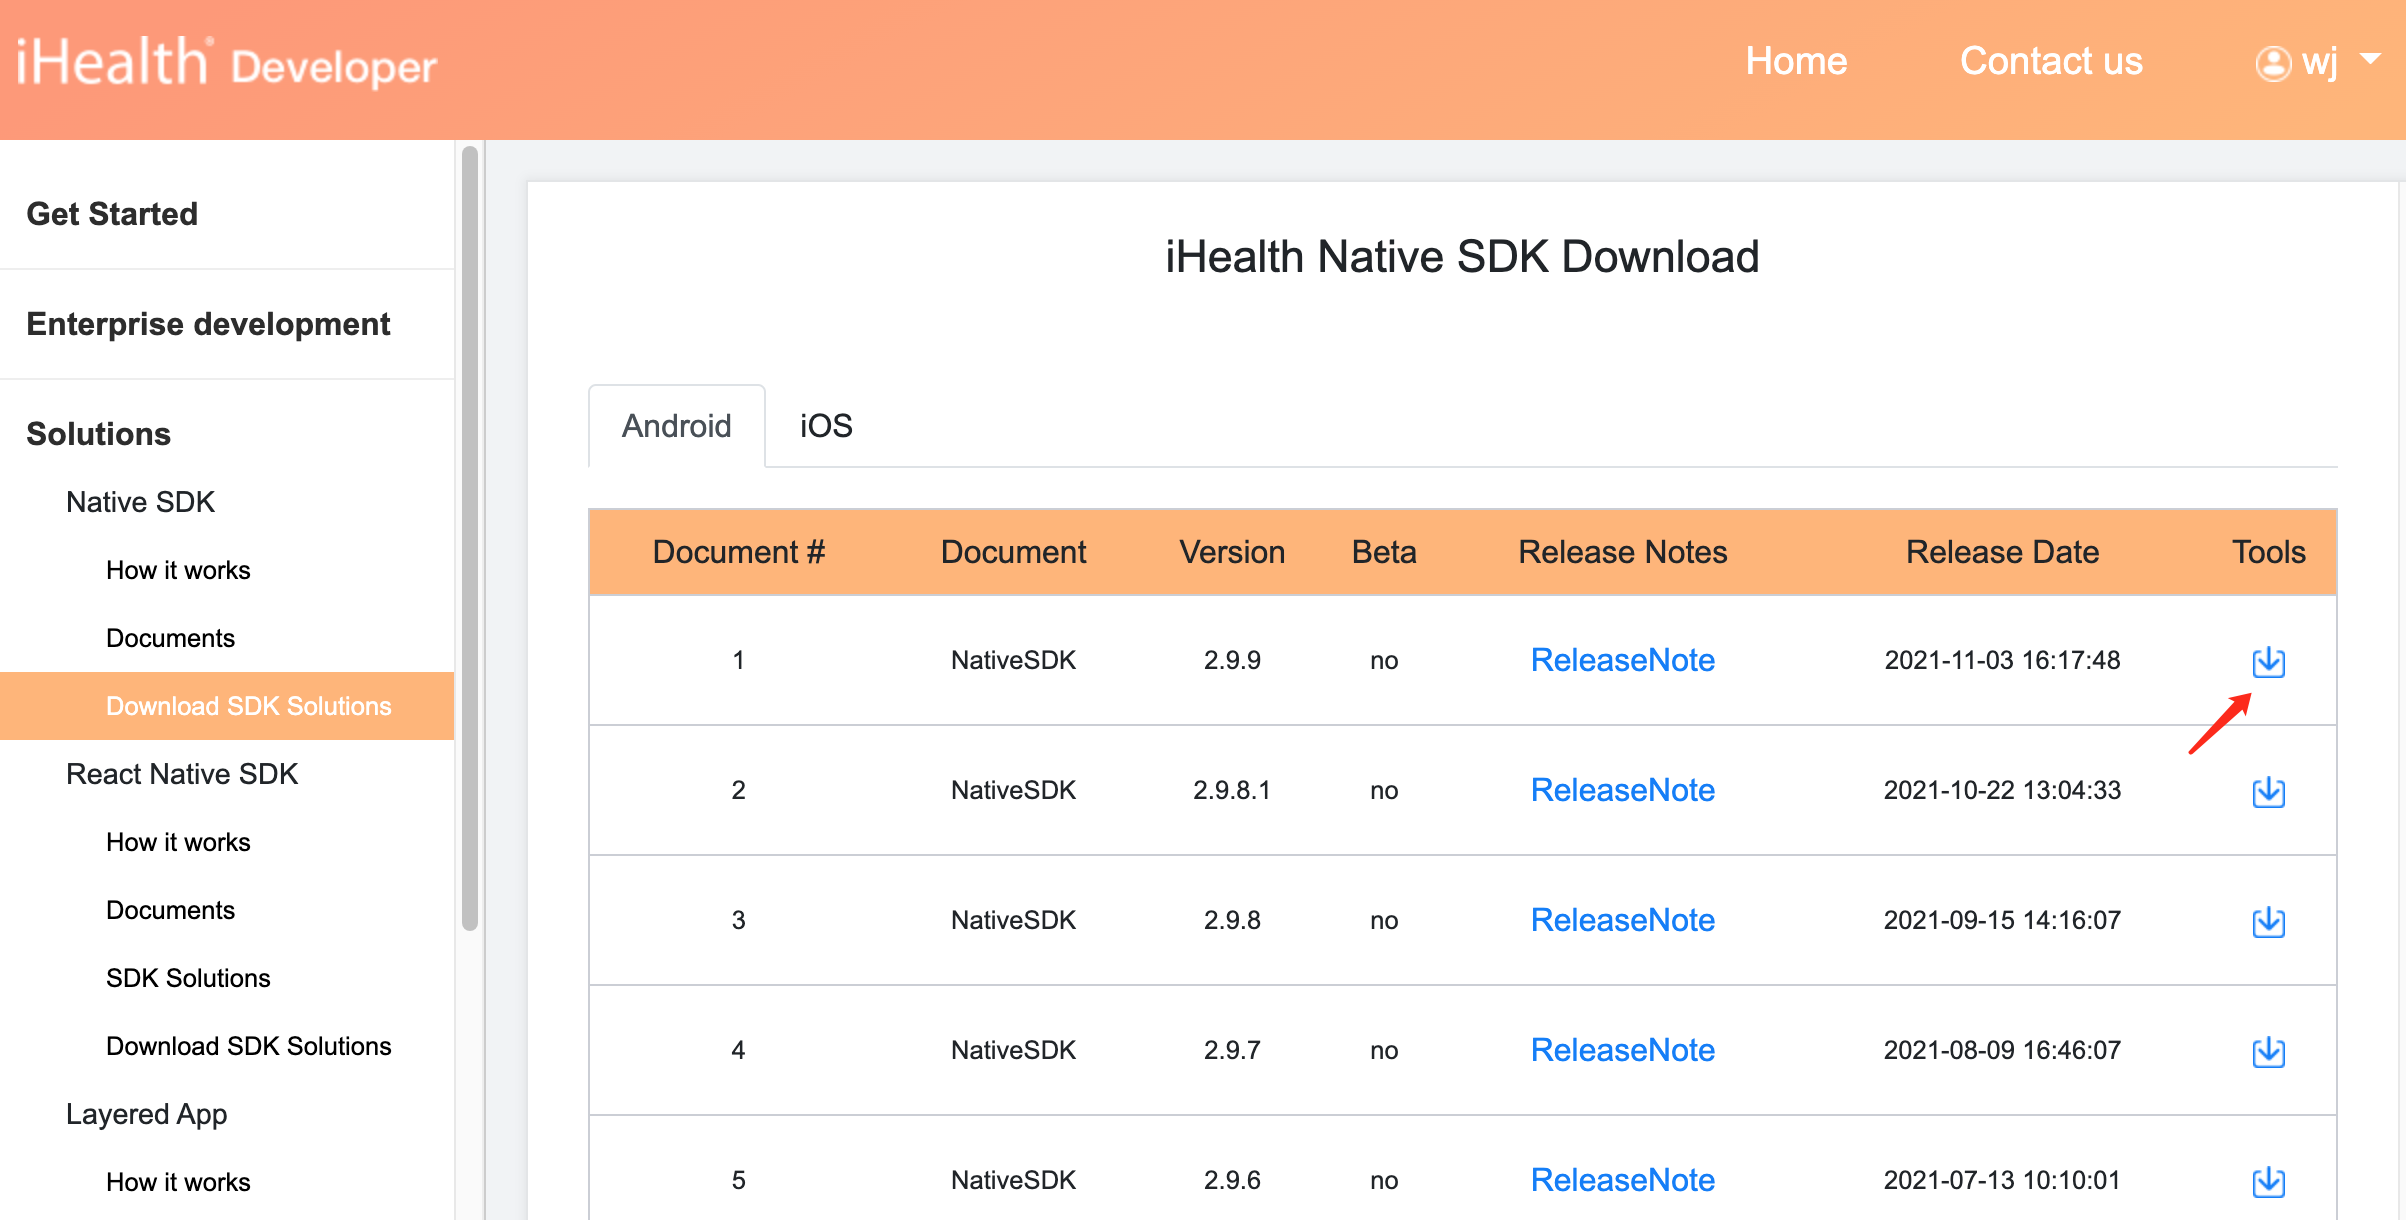
Download .pem file at App Management if your solution need.
Step 4: Add license in your application
As shown below, add your license file to your root assets folder.
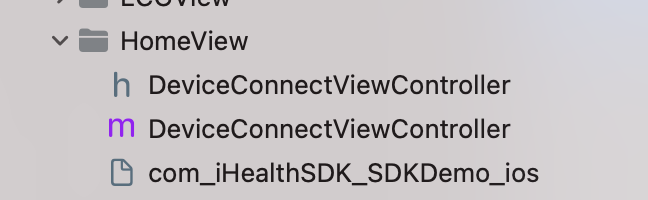
Step 5: Add SDK library and .h file
As shown below, add your SDK .a file and .h file to your project.

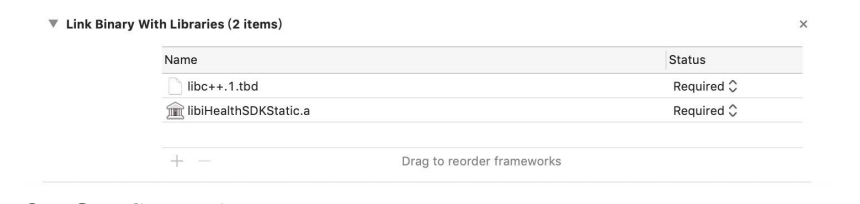
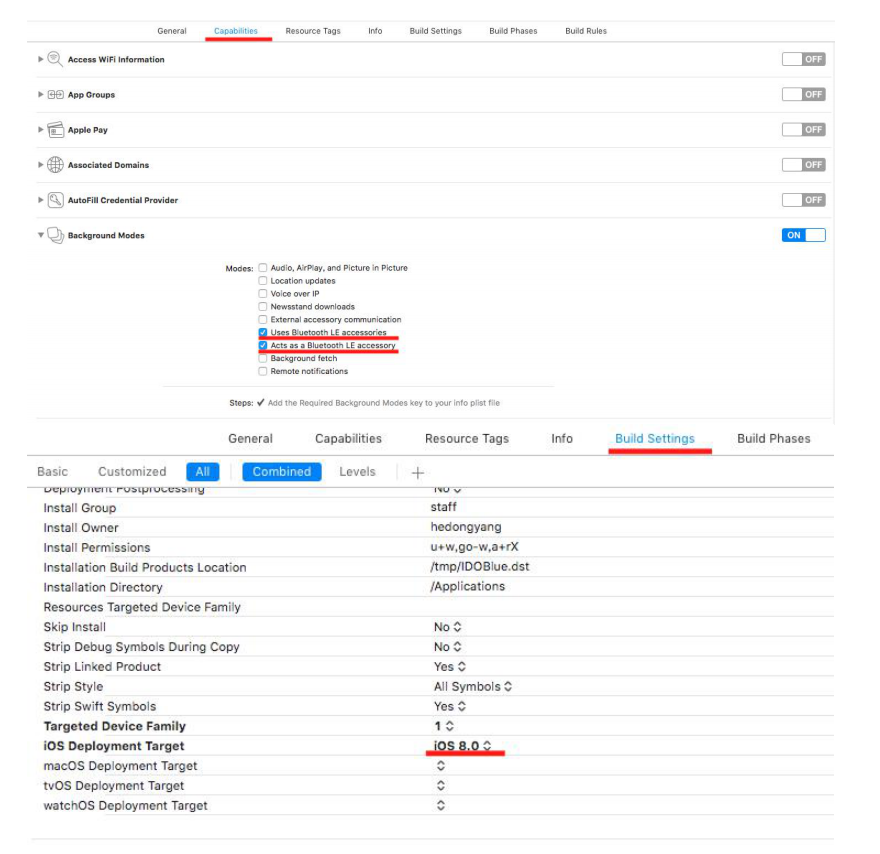
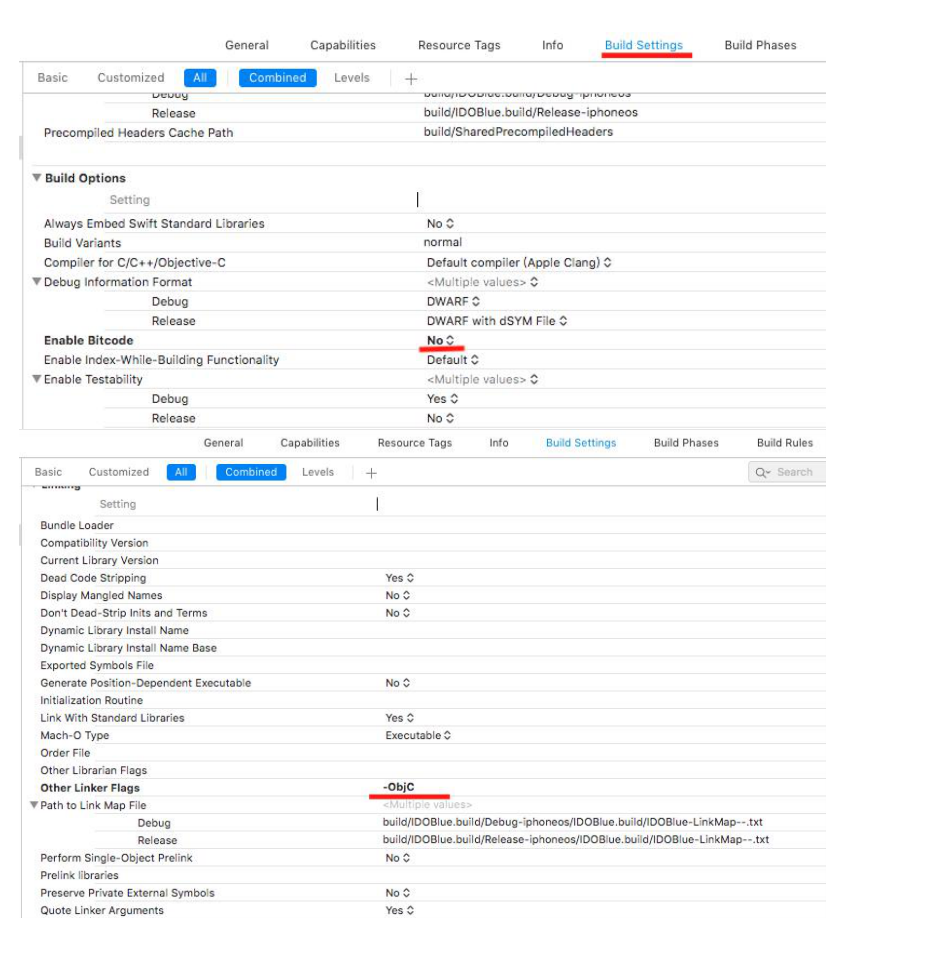
Step 6: Add Frameworks and Configuration
Add Frameworks:
Configuration:
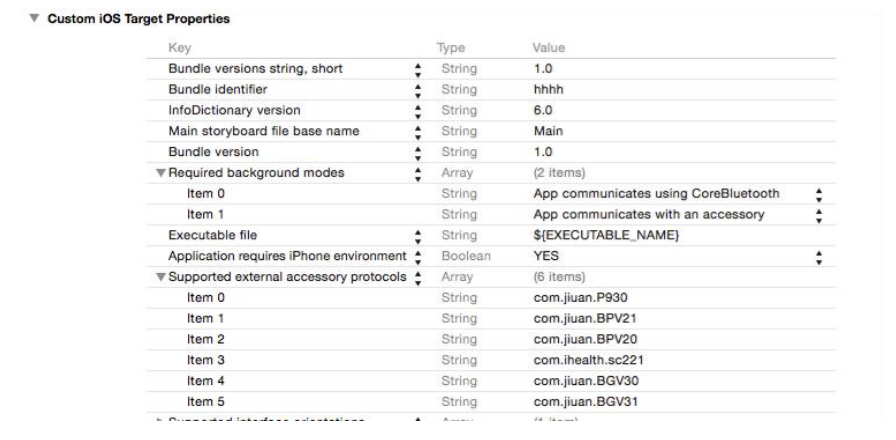
If you are not using the device mentioned below, please do not configure the protocol, otherwise it may affect the review of the program in the applestore ! ! !
Add 2 new Item in ‘Supported external accessory protocols’ ,Different products need to add different protocols.
If you use these devices, please contact us before submitting the Apple Store. We will generate a ppid based on the information you provided to help your app pass the review. If you do not have ppid, you may be rejected during the review.
If you're using BG5, you need to add protocol:com.jiuan.BGV31
If you're using BP3, you need to add protocol:com.jiuan.P930
If you're using BP5 or BP7, you need to add protocol:com.jiuan.BPV20、com.jiuan.BPV23
If you're using ABI, you need to add protocol:com.jiuan.BPV21
If you're using HS3, you need to add protocol:com.ihealth.sc221
If you're using BG1,you need to add Item NSMicrophoneUsageDescription Add 1 new Item in ‘Required background modes’:
App communicates with an accessory、 App communicates using CoreBluetooth
Step 7: Other Settings
Step 8: Authentication license
Please call the following method, if the license is invalid, it will return false. When the license needs to be updated, the first call will return false, the SDK will sync with the server, and the next call will return true.
If you want to use the iHealth Device, you must first call authentication method, can call after certification by iHealth relevant methods of the device. Get your app approved and download license file at:
Authentication API:
-(void)commandSDKUserValidationWithLicense:(NSData *)licenseData UserDeviceAccess:(DisposeSDKUserDeviceAccess)userDeviceAcce ssUserValidationSuccess:(DisposeSDKUserValidationSuccess)user ValidationSuccess DisposeErrorBlock:(DisposeSDKUserValidationErrorBlock)dispo seValidationErrorBlock
Step 9: Scan and Connect
Before scanning and connecting the device, you need to call the authentication interface to get permission. After the authentication is passed, you can scan the connection. Otherwise, you will not be able to scan the connection to any device.
For classic bluetooth and audio devices, you don't need to call the scan connection method, just listen for the corresponding notification message to connect to the device.
For classic bluetooth devices, you need the bluetooth option in the mobile Settings to manually connect the device. These devices include: iHealth BP3 、iHealth ABI、 iHealth BP5 、iHealth BP7 、iHealth HS3、BG5.
For the BG1, all you need to do is plug the device into the phone's headphone jack.
Before scanning the device connection, you need to initialize the code of the corresponding device and add listening notification messages.
Example:
Classic bluetooth device BP5:
[BP5Controller shareBP5Controller];
[[NSNotificationCenter defaultCenter]addObserver:self selector:@selector(DeviceConnect:) name:BP5ConnectNoti object:nil];
[[NSNotificationCenter defaultCenter]addObserver:self selector:@selector(DeviceDisConnect:) name:BP5DisConnectNoti object:nil];
Low power bluetooth device BP3L:
[BP3LController shareBP3LController];
[[NSNotificationCenter defaultCenter]addObserver:self selector:@selector(DeviceDiscover:) name:BP3LDiscover object:nil];
[[NSNotificationCenter defaultCenter]addObserver:self selector:@selector(DeviceConnectFail:) name:BP3LConnectFailed object:nil];
[[NSNotificationCenter defaultCenter]addObserver:self selector:@selector(DeviceConnect:) name:BP3LConnectNoti object:nil];
[[NSNotificationCenter defaultCenter]addObserver:self selector:@selector(DeviceDisConnect:) name:BP3LDisConnectNoti object:nil];
Scan device API:
-(int)commandScanDeviceType:(HealthDeviceType)tempDeviceType
Connect device API:
-(int)commandContectDeviceWithDeviceType:(HealthDeviceType) tempDeviceType andSerialNub:(NSString *)tempSerialNub
When the device is scanned, you can call the connection method to connect the device, and when the connection is notified, you can get the device object to call the API of the device.
Example:
-(void)DeviceConnectForBP5:(NSNotification *)tempNoti{
BP5Controller *controller = [BP5Controller shareBP5Controller];

NSArray *bpDeviceArray = [controller getAllCurrentBP5Instace];

if (bpDeviceArray.count) {
    BP5* bp5Instance = [bpDeviceArray objectAtIndex:0];
    }
}
Step 10: Native SDK supported devices list
BP:
iHealth BP3 、iHealth BP3L、 iHealth BP5 、iHealth BP7 、 iHealth BP7S、 iHealth Continua BP、 iHealth KN550BT、 iHealth ABI 、iHealth ABP100、 iHealth BPM1、 iHealth BP5S、 iHealth KD-5811BT (iOS SDK 2.14.0 and above)、 iHealth KN550LT (iOS SDK 2.14.0 and above)、 iHealth BP300CL (iOS SDK 2.15.0 and above)、 iHealth KD723SE (iOS SDK 2.15.0 and above)
HS:
iHealth HS2、iHealth HS2S、 iHealth HS3、 iHealth HS4、 iHealth HS4S(Same with HS4)、 iHealth HS5、 iHealth HS5S、 iHealth HS6
AM:
iHealth AM3 、iHealth AM3S 、iHealth AM4 、iHealth AM5
BG:
iHealth BG1、iHealthBG1S、 iHealth BG3 、iHealth BG5、 iHealth BG5S、
PO:
iHealth PO3、iHealth PO3M、iHealth PO1
Thermometer:
THV3 、TS28B 、NT13B、PT3SBT
Support Update iHealth Device for iOS
AM3、AM3S、AM4 、HS4 、HS4S 、HS2 、BG5S、PO3M ABP100 、BP5S 、HS2S、PT3SBT